

Additional features
-
Night mode
Your ticket to the 2026 World Cup: How citizens of Uzbekistan can apply for a U.S. tourist visa on their own
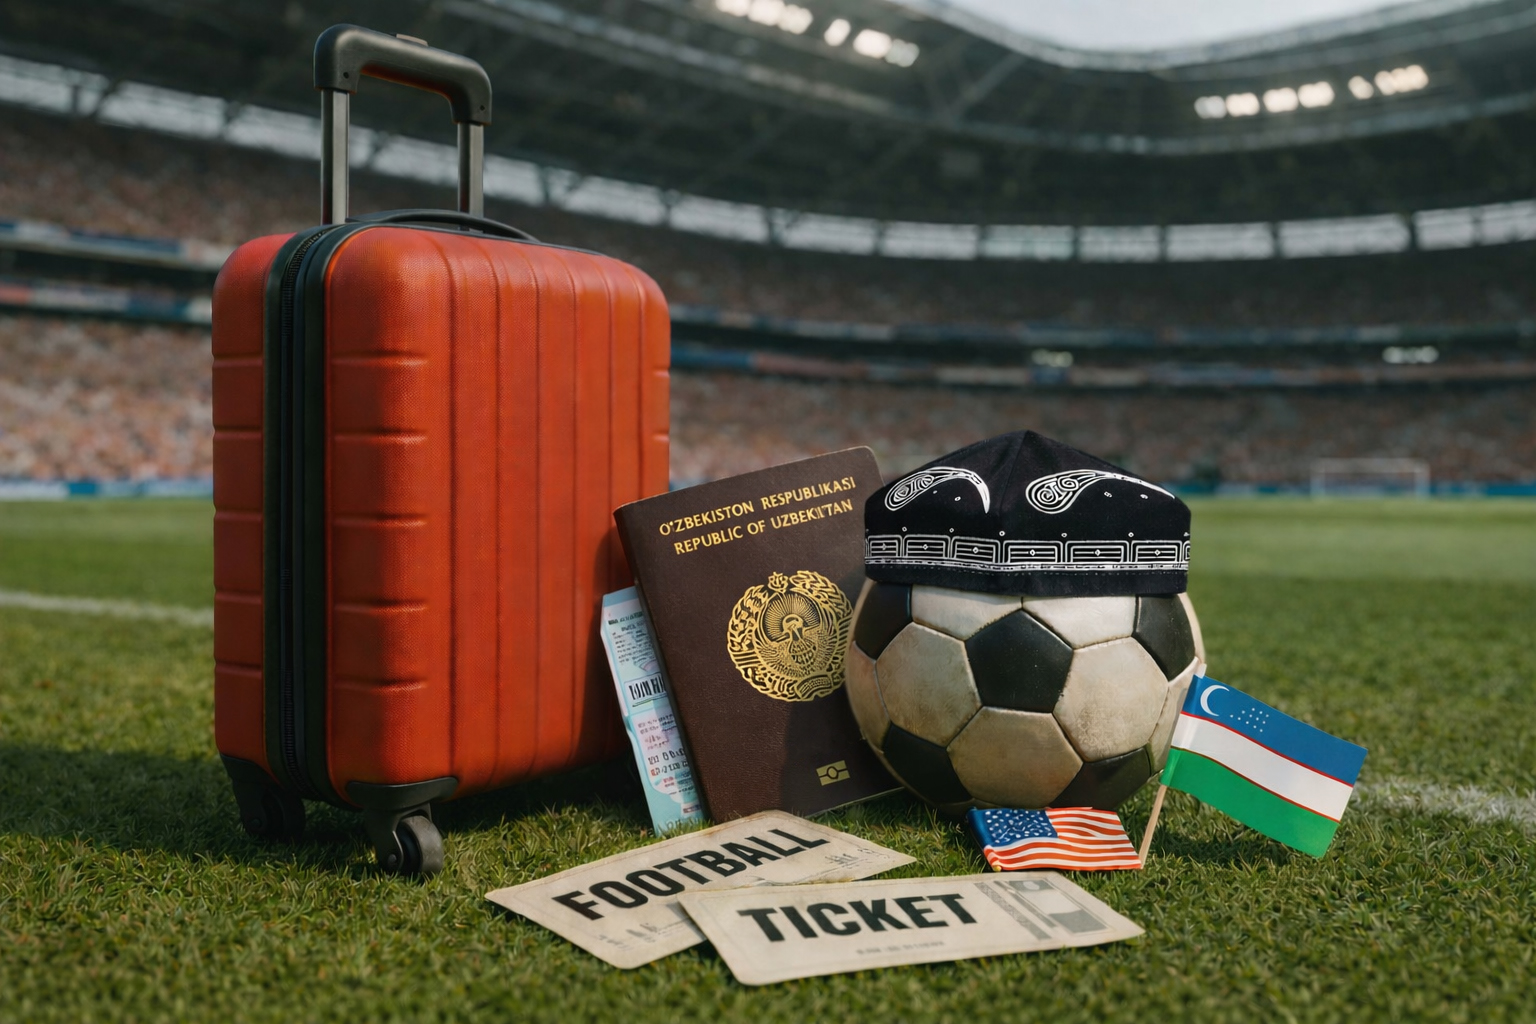
The 2026 FIFA World Cup will take place in the United States, Canada, and Mexico. For football fans from Uzbekistan, this sounds like a dream: world-class matches, new cities, and big stadiums. However, before getting to the stadium, there is one important step — obtaining a U.S. visa, which must be arranged in advance. In reality, the entire process can be completed independently. In this article, we explain which visa is required to travel to the United States — both for attending the 2026 World Cup matches and for regular tourism — how much it costs, where to attend the interview, how to apply, and the most common reasons for visa refusals.
Which visa is required for the 2026 World Cup?
If you are traveling to the United States as a fan, you need a B-2 nonimmigrant tourist visa. This visa is suitable for:
- attending matches and other sporting events;
- traveling within the country;
- tourism.
No other visa types are required for this purpose.
How much does a U.S. tourist visa cost?
The cost of a tourist visa is 185 US dollars.
This is a consular fee that includes the review of the DS-160 application form and the visa interview at the embassy. This is the only mandatory fee when applying for a U.S. visa.
Where citizens of Uzbekistan apply for a U.S. tourist visa
U.S. visa interviews for citizens of Uzbekistan take place at the U.S. Embassy in Tashkent.
Since 2025, submitting documents and attending a visa interview are only possible in the applicant’s country of citizenship, provided that the country has its own U.S. embassy. In this case, the entire process — from scheduling the appointment to attending the interview — takes place at the respective embassy. For citizens of Uzbekistan, this is the U.S. Embassy in Tashkent.
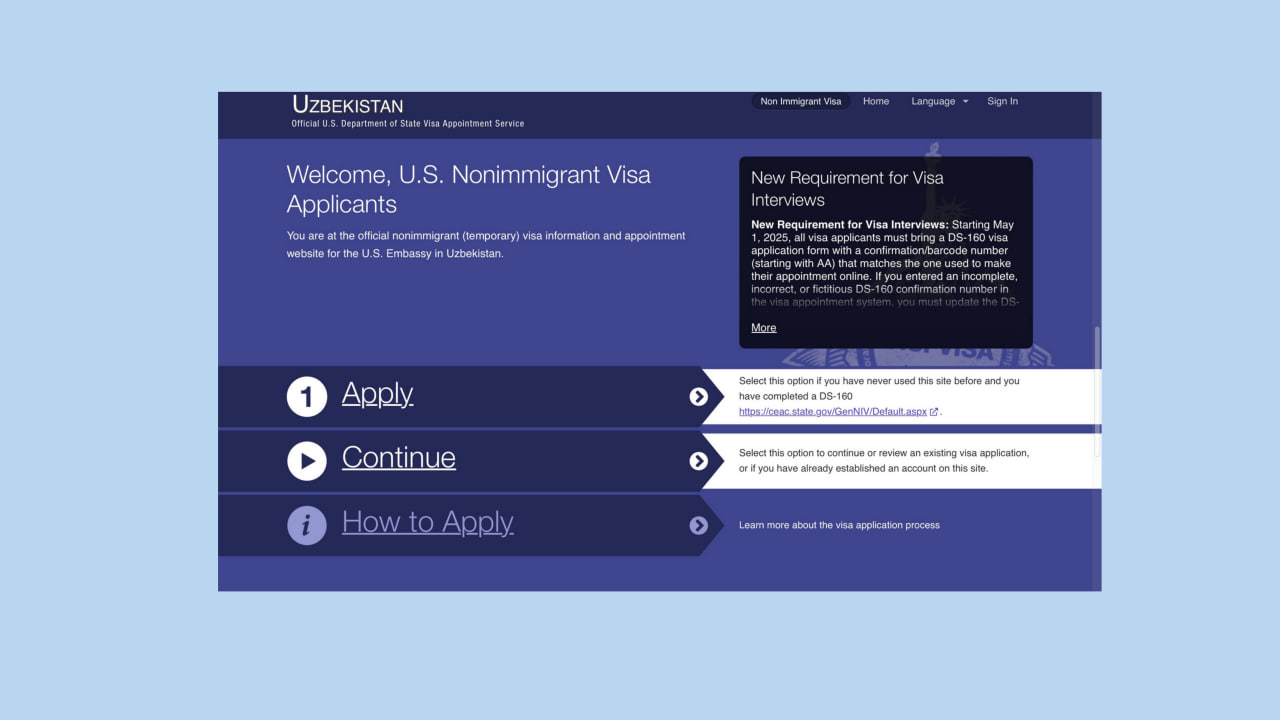
U.S. tourist visa application process
The application process consists of several consecutive steps: completing the online application form, paying the consular fee, scheduling an interview, and attending a personal interview at the embassy. Below is a detailed step-by-step guide.
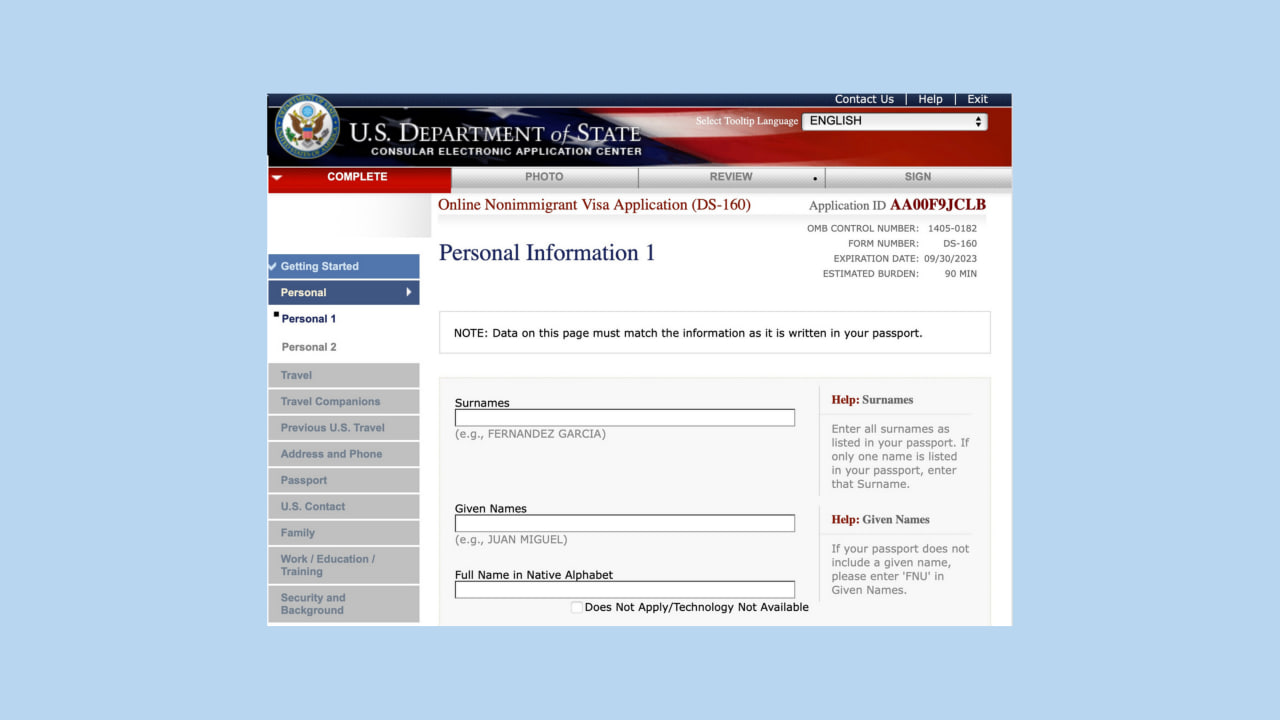
Step 1 — Completing the DS-160 form
The DS-160 is the official electronic application for a nonimmigrant visa (including the B-2 tourist visa). All applicants must complete this form.
1. Go to the official website of the U.S. Department of State for visa applications. This is where the DS-160 form for nonimmigrant visas is available.
2. Select the tip language (for example, Russian), but complete the form in English.
3. Select the interview location — Uzbekistan.
4. Upload a photo. If the photo does not meet the requirements, the system will automatically notify you and ask you to correct it.

1. Enter your personal information: passport details, contact information, education, employment, travel history, and purpose of travel (for example: Tourism / FIFA World Cup 2026).
2. Provide your social media usernames for the last five years.
1. Review your answers and submit the form.
What must be saved
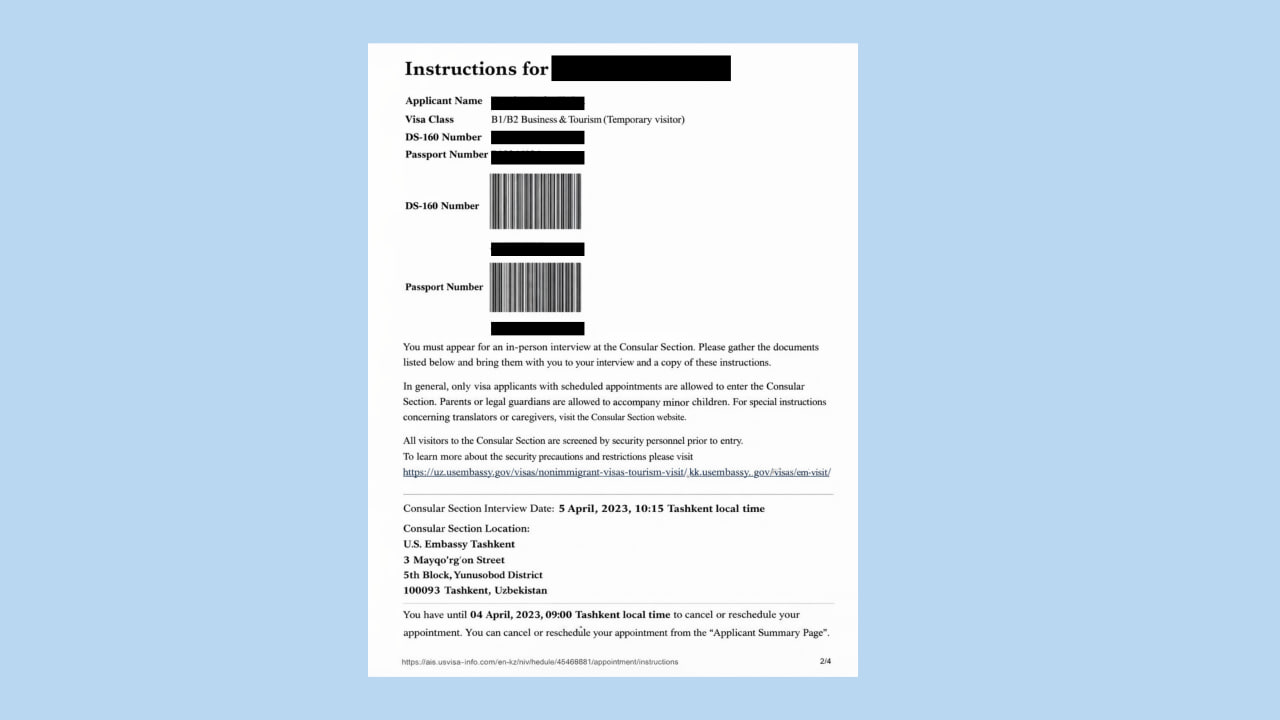
The DS-160 Confirmation Page — it contains a barcode and your application number. You will need this page when scheduling your appointment and at the interview.

Step 2 — Paying the consular fee
After completing the DS-160, you must pay the visa fee — 185 USD. This is a mandatory payment.
Where and how to pay the U.S. tourist visa fee
Payment is made only through the official appointment system. In this system, you will:
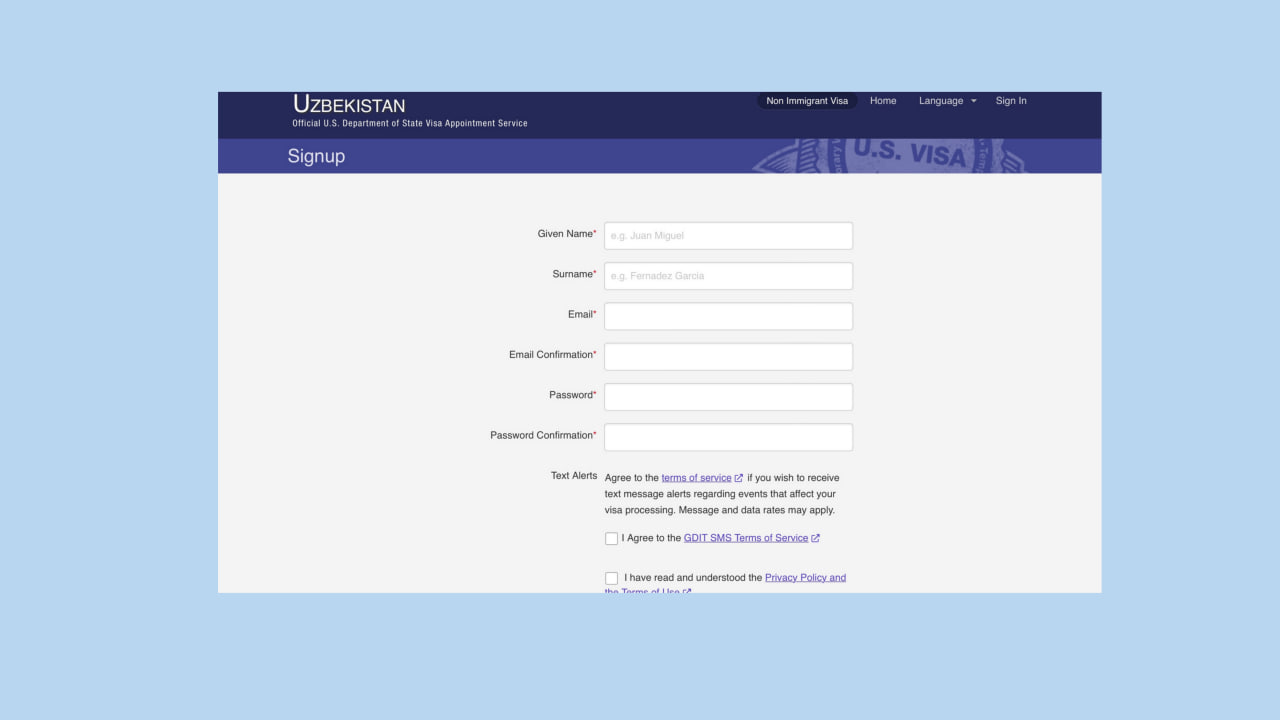
1. Create a personal account
Click the “Create Account” button and, in the pop-up window, select the appropriate option. Choose “I have completed the DS-160 form and want to apply for a visa.” Then fill in all required fields with your personal information.

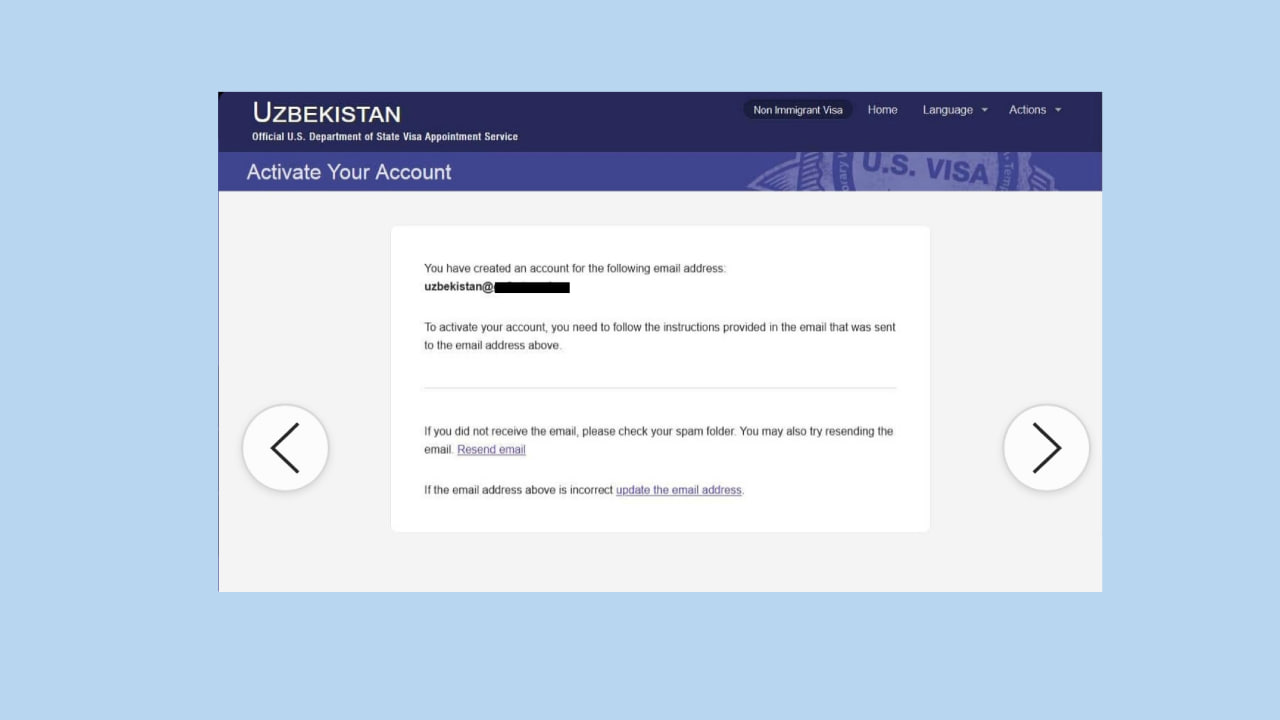
2. Activate your account
After completing the registration form, an email with an activation link will be sent to your email address. Click the link to activate your account.

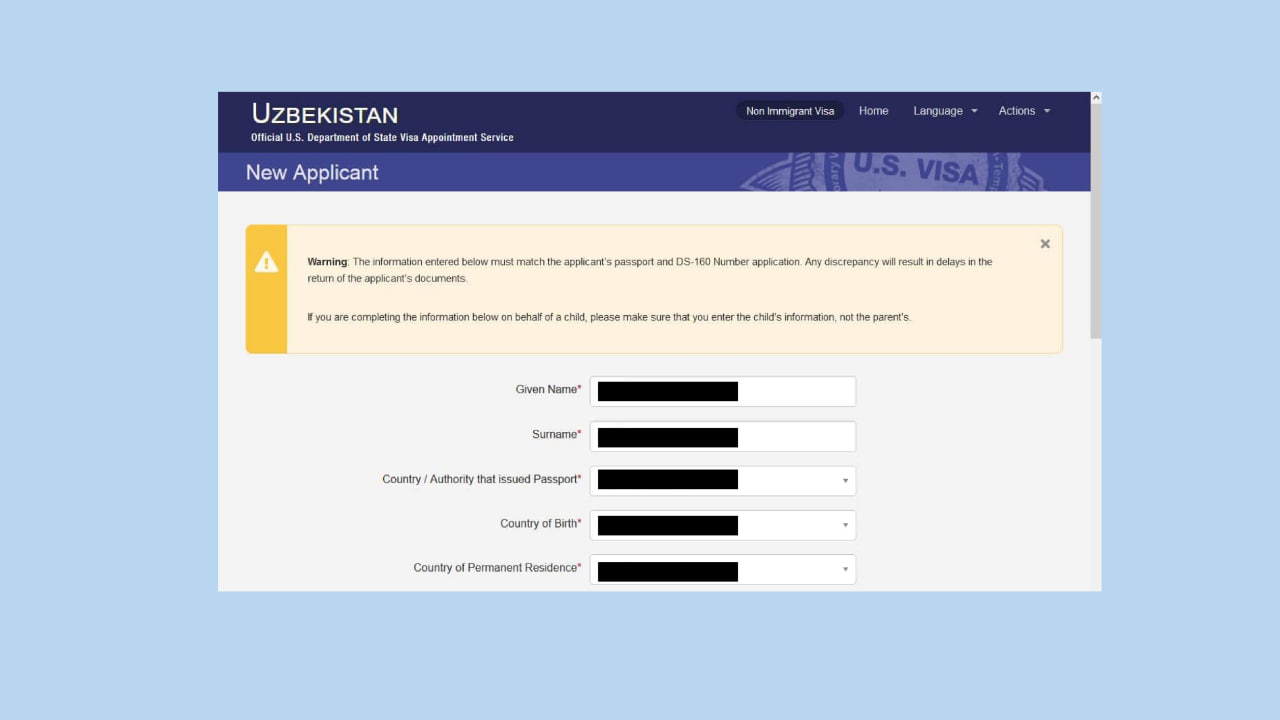
3. Complete personal details
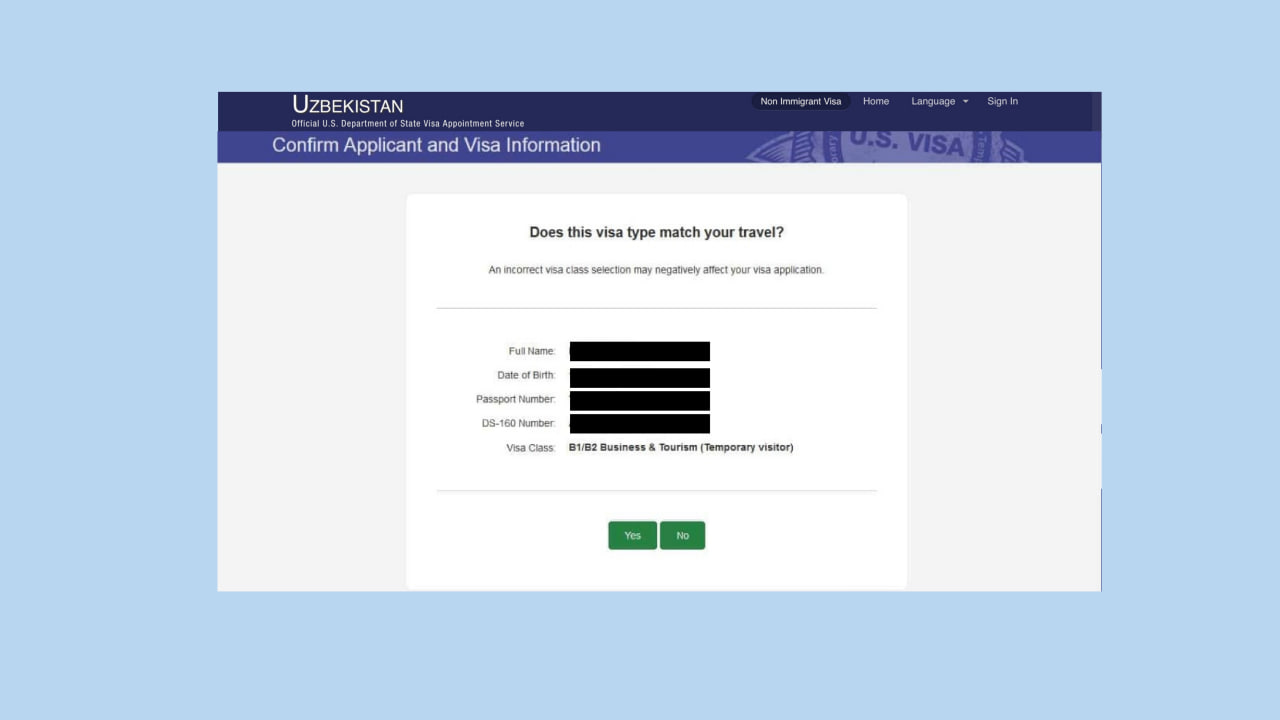
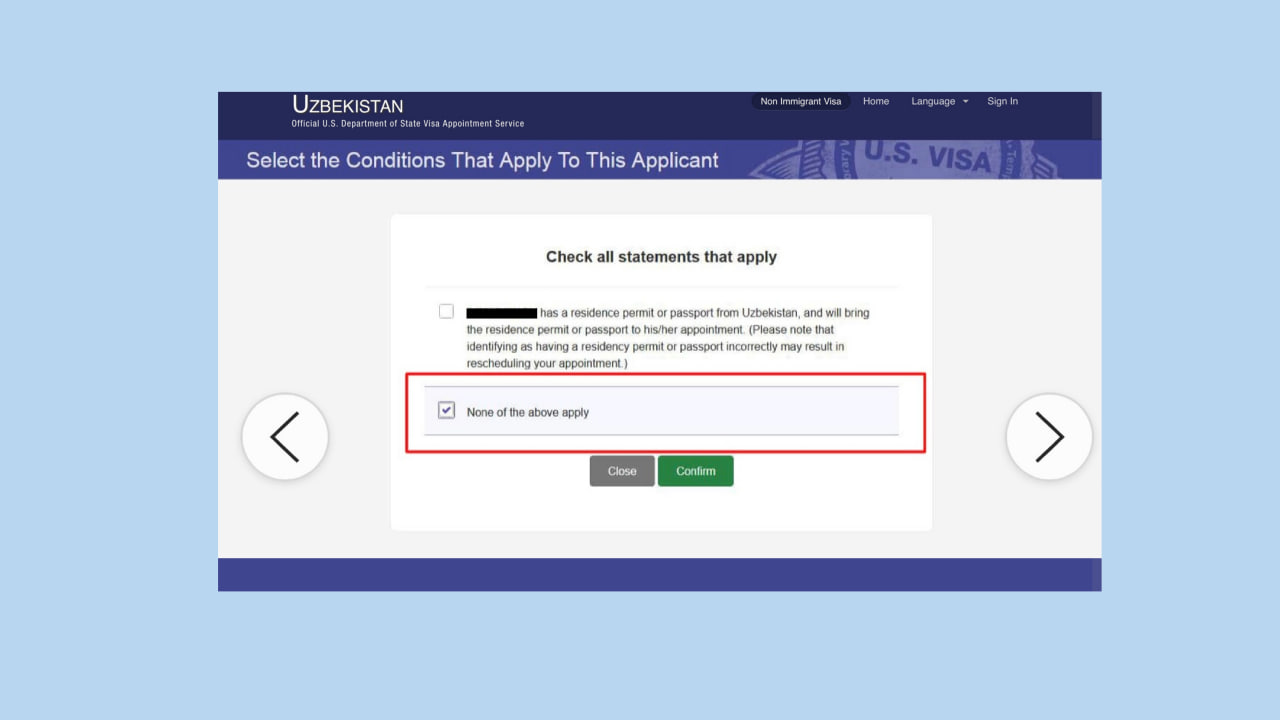
Log in to your account and complete your personal information, including entering your DS-160 confirmation number. You will then confirm the required visa type. At this stage, you can also add an additional applicant — a family member or group participant. For families or groups, one shared profile may be used for visa registration and interview scheduling.
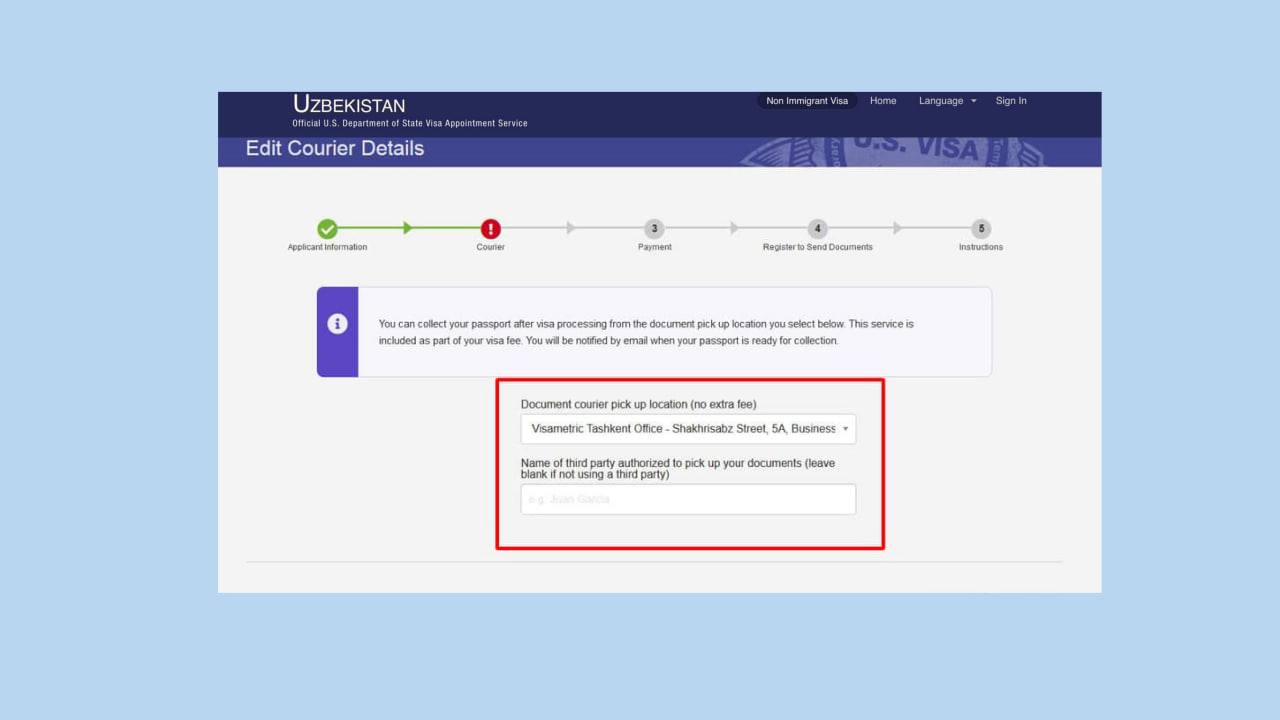
4. Select passport pickup location
Choose the passport pickup location and specify the name of the person authorized to collect your passport after visa approval. If you plan to collect it personally, this field may be left blank.
5. Pay the visa fee
After completing all required fields, proceed to the payment system and pay the visa fee.
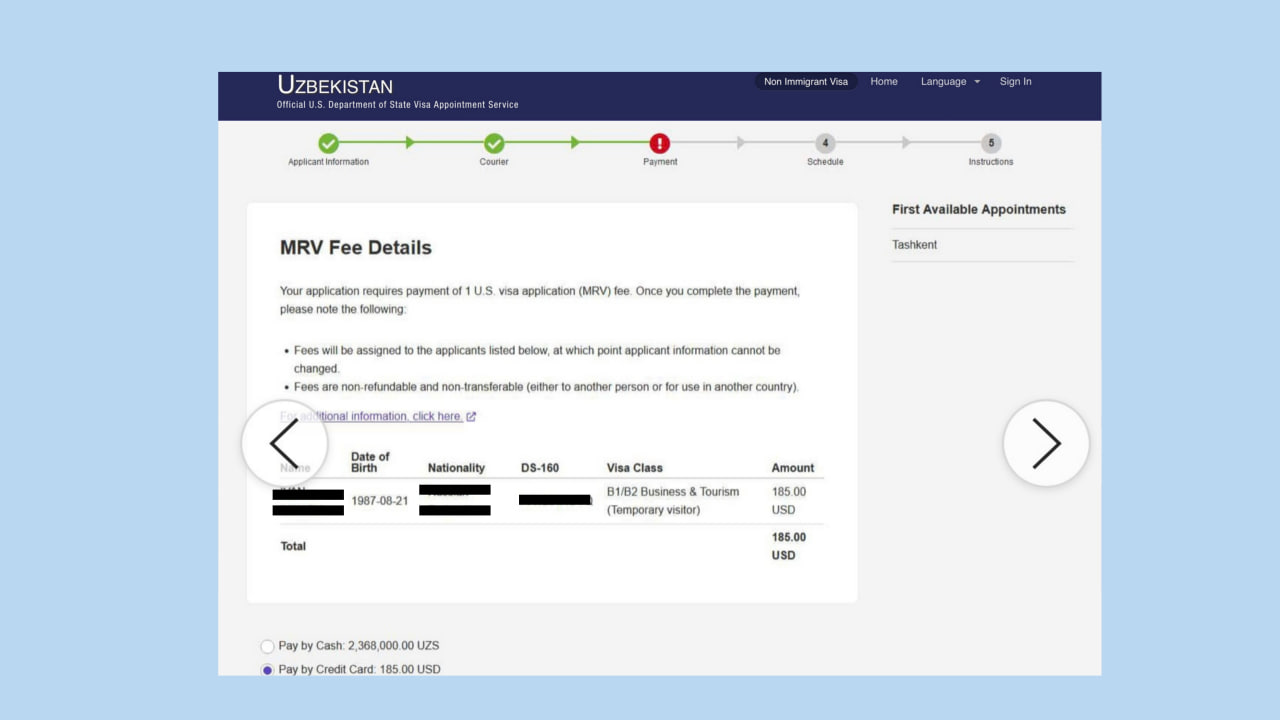
Payment methods
- Online payment by MasterCard or Visa in U.S. dollars;
- Cash payment at any Tenge Bank branch following the instructions on the website (processing may take up to two business days).
After successful payment, the payment status is updated automatically, and the receipt is saved in your profile. You must print it and bring it to the interview.
Tip: Without paying the fee, the system will not allow you to select an interview date.
Step 3 — Scheduling the interview
1. After payment, go to the “Schedule Appointment” section.
2. Select the city — Tashkent.

1. View available dates and choose a convenient one.

1. After confirmation, you will receive an appointment confirmation notice. If no dates are available, this is normal — new dates appear as a result of cancellations and rescheduling. Check the Schedule Appointment section regularly. The visa fee does not need to be paid again; it is charged once and remains valid in the system.

Important: Be sure to save and print the appointment confirmation and bring it to your interview. It includes your full name, passport number, DS-160 number, and delivery details.
Step 4 — Preparing for the interview
What to bring
- Passport;
- DS-160 Confirmation Page;
- Interview appointment confirmation;
- Visa fee payment receipt;
- Photograph (if the digital photo was not accepted).
Additional documents
- Income certificate;
- Employment or study certificate;
- Evidence of property ownership or other assets;
- Marriage certificate;
- Children’s birth certificates;
- Property ownership or rental documents;
- Flight and hotel reservations;
- Travel itinerary or plan.
Tip: These documents are shown only if requested by the consular officer. The decision is based primarily on your DS-160 application and your interview answers.
How to prepare for the interview
Interview format
The interview usually lasts 3–5 minutes. It is a short conversation in which the officer clarifies the purpose of your trip, travel dates, and your ties to Uzbekistan.
Common interview questions
1. What is the purpose of your trip?
2. How long do you plan to stay in the U.S.?
3. Where do you work or study?
4. Who is paying for your trip?
5. Have you traveled to the U.S. or other countries before?
How to behave
Answer calmly and clearly. There is no need to guess “correct” answers or overcomplicate your explanations.
What is really important
What matters is not how you speak, but how logical and consistent your story is and how confident you are in your answers.
Visa decision
After the interview, a decision is usually made quickly — often on the same day. You can tell the result either from the officer’s words or by whether your passport is kept at the embassy.
Visa approval
Your passport will be kept for visa issuance and returned via courier service within a few business days. Before traveling, make sure all visa details are correct.
Administrative processing
This is not a refusal, but an additional review of documents or information. It may take from several days to several weeks, during which the passport remains at the embassy.
Visa refusal
In case of refusal, the passport is returned immediately along with a refusal notice. This is not a lifetime ban, and you may apply again if your circumstances change.
Is it really that easy to get a U.S. tourist visa?
When reviewing an application, the consular officer primarily assesses whether the applicant has sufficient reasons to return to their home country after the trip. Insufficient proof of ties is the most common reason for refusal.
Most common reasons for refusal
Inconsistent or unconvincing interview answers
Different explanations of travel purpose, uncertainty, or contradictions between the DS-160 form and interview responses.
Example:
The DS-160 states: Tourism / FIFA World Cup 2026.
At the interview, the applicant says they are “just visiting the U.S.” and cannot confidently answer questions about match locations or travel dates. This appears inconsistent with the stated purpose.
Unclear purpose of travel
When the applicant cannot clearly explain why they are traveling, for how long, or what they plan to do.
Immigration risks
Young age, lack of international travel history, relatives in the U.S., or previous visa violations may raise concerns.
Weak ties to the home country
Lack of stable employment, education, family, or other factors demonstrating intent to return after the trip.
Applying for a U.S. visa is not the easiest process, but it is clear and manageable. All steps can be completed independently if you take your time, carefully complete the application, and answer interview questions honestly. The most important thing for the consular officer is understanding why you are traveling and being confident that you intend to return home.
If your visa is refused, it is disappointing — but not the end. Such a refusal does not prevent future travel. With changed circumstances and better preparation, you can apply again and successfully obtain a visa.

Related News
12:40 / 08.07.2026
Uzbek diaspora in Seattle forms officially registered community association
11:48 / 03.07.2026
Uzbekistan’s overseas investment surges 33-fold after regulatory easing
11:57 / 02.07.2026
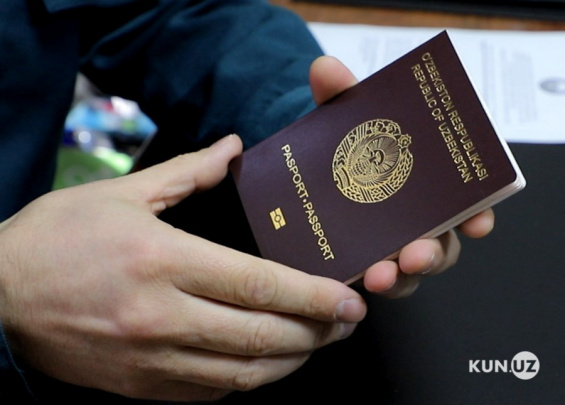
Uzbekistan ranks 123rd globally, second in Central Asia in new passport index
17:00 / 01.07.2026